Printer

6:15 AM vivvzh 0 Comments

In class, Cynthia and I did another exercise in reverse engineering by taking apart an old HP printer. Turns out, those things are made of more parts than you'd imagine!

Affordances and Mapping

Some affordances we noticed:
  • The tray is paper sized, indicating that we should put paper there
  • Lots of finger holes/indents everywhere 
  • Buttons stick out, making them infinitely more pressable
Some instances of mapping:
  • Ink cartridges are distinguished by color
  • Buttons had lights behind them, which presumably indicated the printer's activity


Interfaces

This printer is complex! Here are some ways the pieces fit together:
  • Pieces are designed to go in but not come out i.e. lots of the plastic bits had "hooks" on them (plastic tab flexures and regular tabs)
  • Interior was fastened together by lots of screws
  • Paper was funneled through the printer by gears


Cost and Manufacturing

The vast majority of the plastic parts were obviously injection molded, particularly the shell (body) of the printer. The internal coils and wire/rods were extruded, and there were several large stamped metal sheets on the bottom and inside of the printer. Our best guess for the screws' production was casting or rolling, but judging by the crudeness of their form, they are more likely to have been rolled. 


0 comments:

Grip Aid

9:23 AM vivvzh 1 Comments


Caitlin, Annie, and I did some brainstorming and research into a grip aid for adaptive feathering. Here's what we came up with:

Key Brainstorming Ideas
  • Sticky things (attaching fingers to grip)
  • Oar modifications (finger holes, ridges, etc.) 
  • Tying (string to wrap fingers to grip etc.) 
  • Gloves (may include other categories)

Brainstormed Topic Themes
See mind map: circled purple ideas are most promising research directions. These are:
  • Other sports modifications. Since adaptive rowing is relatively new, could look into similar “grip” sports like skiing, golf, tennis, weightlifting, etc. 
  • Medical braces/equipment.
  • What do children use to prevent harm but stay active?
  • How do we ensure quick release for safety? How do we prevent our device from harming the hand/body? 
  • What kinds of material would best allow for flexibility? What types of attachments are possible?
  • Sports regulations 

Google Research with Links
Below are some interesting companies whose products may inspire a project. Each company’s product has different aspects that could be included/further explored:

Other Thoughts
  • Wrist mobility very important 
  • Skiing are a very good opportunity to build on (as well as other existing adaptive sports equipment) 
  • What do rowing grip aids already look like?
  • What regulations are already in place? 

1 comments:

CRI Visit

6:49 PM vivvzh 0 Comments

Last week, we visited CRI (Community Rowing Inc.)’s boathouse for the first time. As a class, we’re going form teams to create products for CRI’s adaptive rowing community. This trip was to conduct exploratory research by asking open-ended questions about the rowers' experiences and challenges.

Meeting With Ash

We met with one CRI adaptive rower, Ash.
- He’s been rowing for 4 years and is aiming to row at nationals
- Has multiple sclerosis, so the right side of his body has very little strength, making him a trunk and arms rower who uses a fixed seat
- Would like a lighter seat to maximize length through water while also maintaining the proper seat angle Has issues with hand grip and feathering
- Is currently using a strap to help with grip, but the strap is ineffective

Dock Visit

Then we went down to the dock where rowers launch their boats and practice on the dock box.
Ramp is steep and doesn’t seem safe for wheelchair rowers
- Dock box can’t accommodate fixed seat
- Dock box is impossible to use with some para rowers who have a hard time getting on it

Boathouse

After visiting the dock box, we went back to the boathouse to get a closer look at the boats
- Seat pads are custom-made by each rower to fit their needs (and they must fit multiple boats)
- Rigger height to seat height ratio is often off; the rigger needs to be more easily raised (or seat lowered)
- Chest strap is too long for some athletes
- For wheelchair rowers, bringing the oars down to the dock is very difficult and requires help
- Some rowers use shoe inserts to even out their leg length, but this makes their feet fall out easily

Erg Room

Then we went upstairs to the erg workout room, where beginners and advanced rowers work to improve their fitness
- The handle is often dropped by younger rowers, resulting in a loud sound
- Changing handles is tricky because nothing holds the chain in place

Precarious dock box

Demonstration of correct feathering technique and grip


0 comments:

Reflection on Disability Reading

1:35 PM vivvzh 0 Comments

After getting a brief overview on the history of disability rights in class, I did some reading about the experience of being disabled and best practices for respecting those with different abilities. In "A Day in the Life of Four Wheelers," four people who use wheelchairs describe their lives. What struck me most was Alex Ghenis's description of his 2 hour-long morning routine, which starts at 6am and is facilitated by his personal attendant. This is an aspect of life I never really thought about. My morning routine varies according to my day-to-day schedule. Some mornings I'll spend a couple hours leisurely getting dressed, having breakfast, etc. Other mornings I'll be rushing out the door. In contrast, Alex is bound by a strict and extensive daily schedule consisting of several chair changes. Seemingly simple things, like getting out of bed, require a lot of thought and maneuvering for people who are disabled. Small inefficiencies add up, making routine activities much more arduous and tiresome. Adaptive technologies must be designed to reduce this sort of everyday friction. 

Photo by Eric Stampfli


0 comments:

CRI Questions

5:07 AM vivvzh 0 Comments

1. How do you begin an erg workout? Would you mind demonstrating? 
2. Do you work out alone or with a coach? If a coach is involved, what is their involvement like?
3. What do you do if you encounter a problem during your workout? 
4. Describe your typical erg workout.
5. What do you find frustrating about the ergs?  

0 comments:

Interesting Adaptive Technologies

5:06 AM vivvzh 1 Comments

Though adaptive technologies are rarely in the spotlight, they play a significant role in the lives of differently abled people, allowing them to move, exercise, learn, etc. with dignity and ease. Here are a few interesting ones I found:


1. iBOT The iBOT is a wheelchair that uses similar technology to the Human Segway Transporter (made by the same inventor, Dean Kamen) to give disabled people the ability to go up and down staircases. By rotated its two sets of wheels about each other, the iBot can "walk" up and down stairs. It can also climb and descend curbs up to 5 inches and travel through many types of rough terrain including sand, gravel, and shallow water.


2. WinTech Adaptive Boat The WinTech Adaptive Boat has many features to cater to rowers with physical disabilities. Pontoons may be fixed to the riggers to help athletes who can’t use their lower body to balance the boats. Seats can be high-backed and fixed into position to support the lower and upper back. However, the restraints are velcro straps that allow for easy release in case of a capsize.


 3. JAWS Screen Reader JAWS stands for Job Access With Speech, and it’s the world’s most popular screen reader. It provides speech and Braille output for most PC computer applications.

1 comments:

Keychain

8:56 PM vivvzh 0 Comments


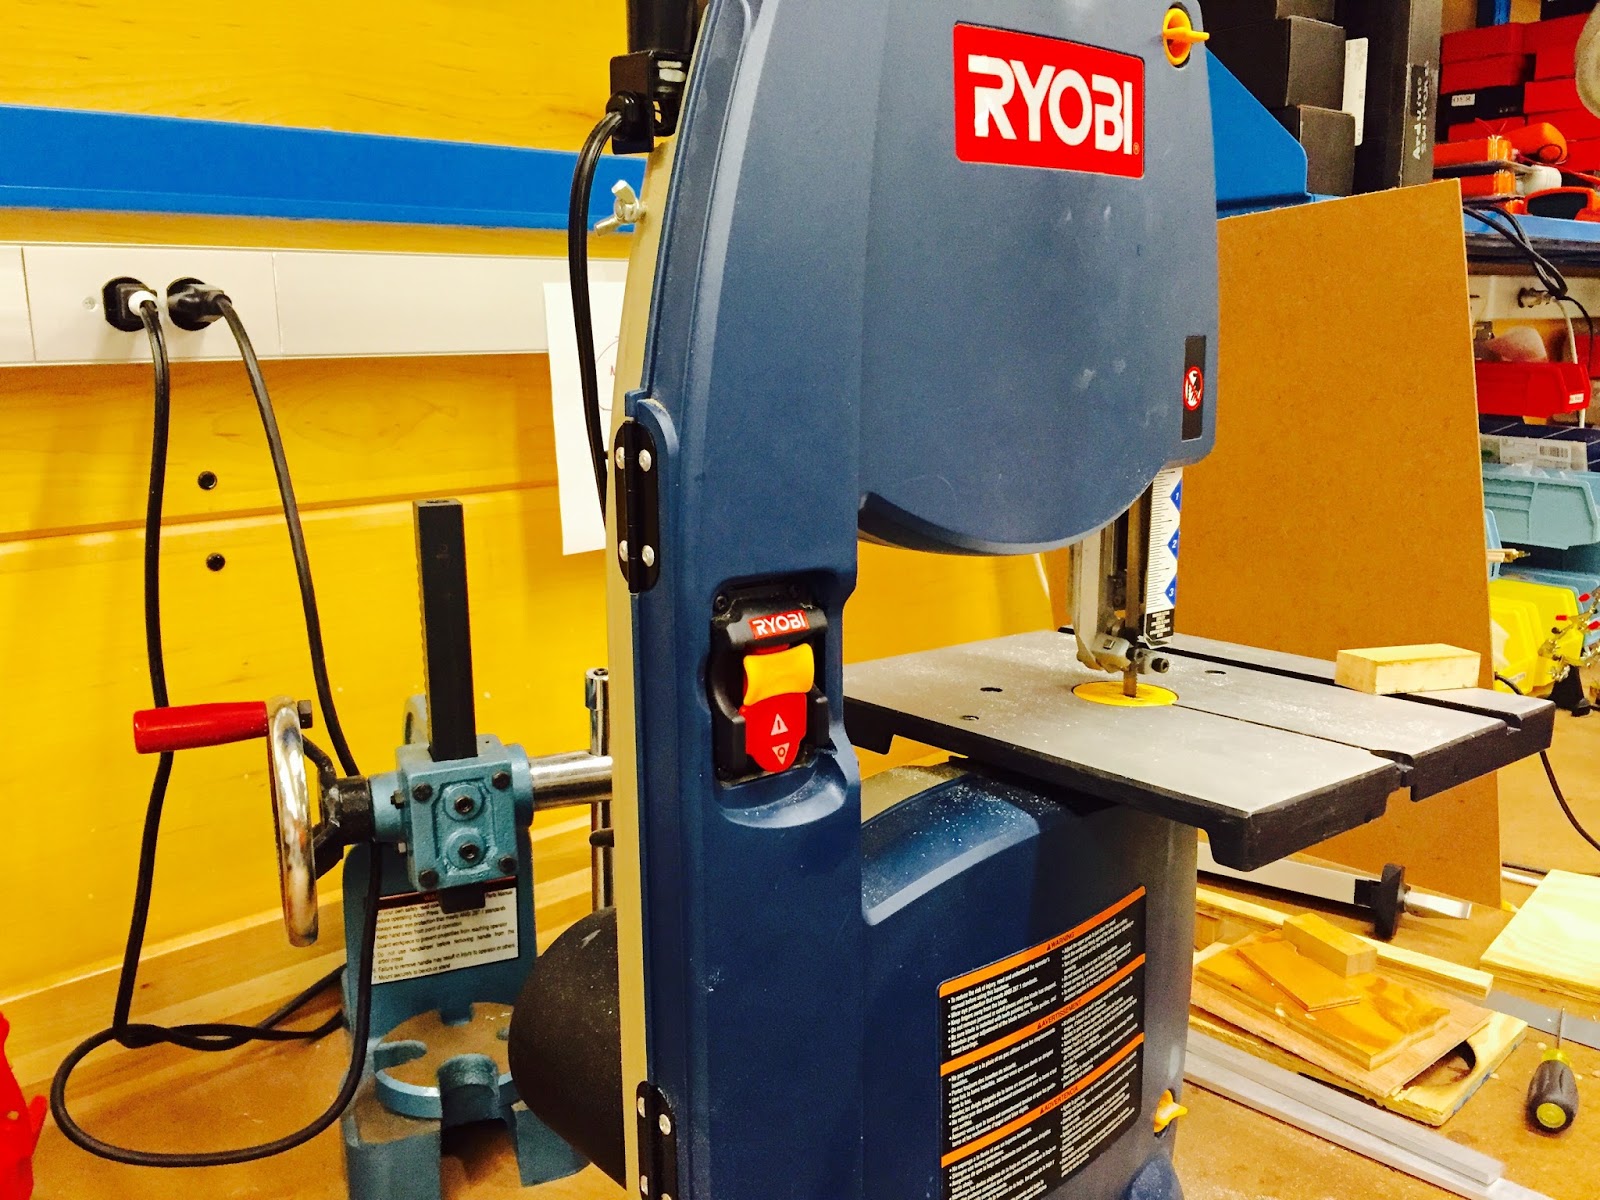
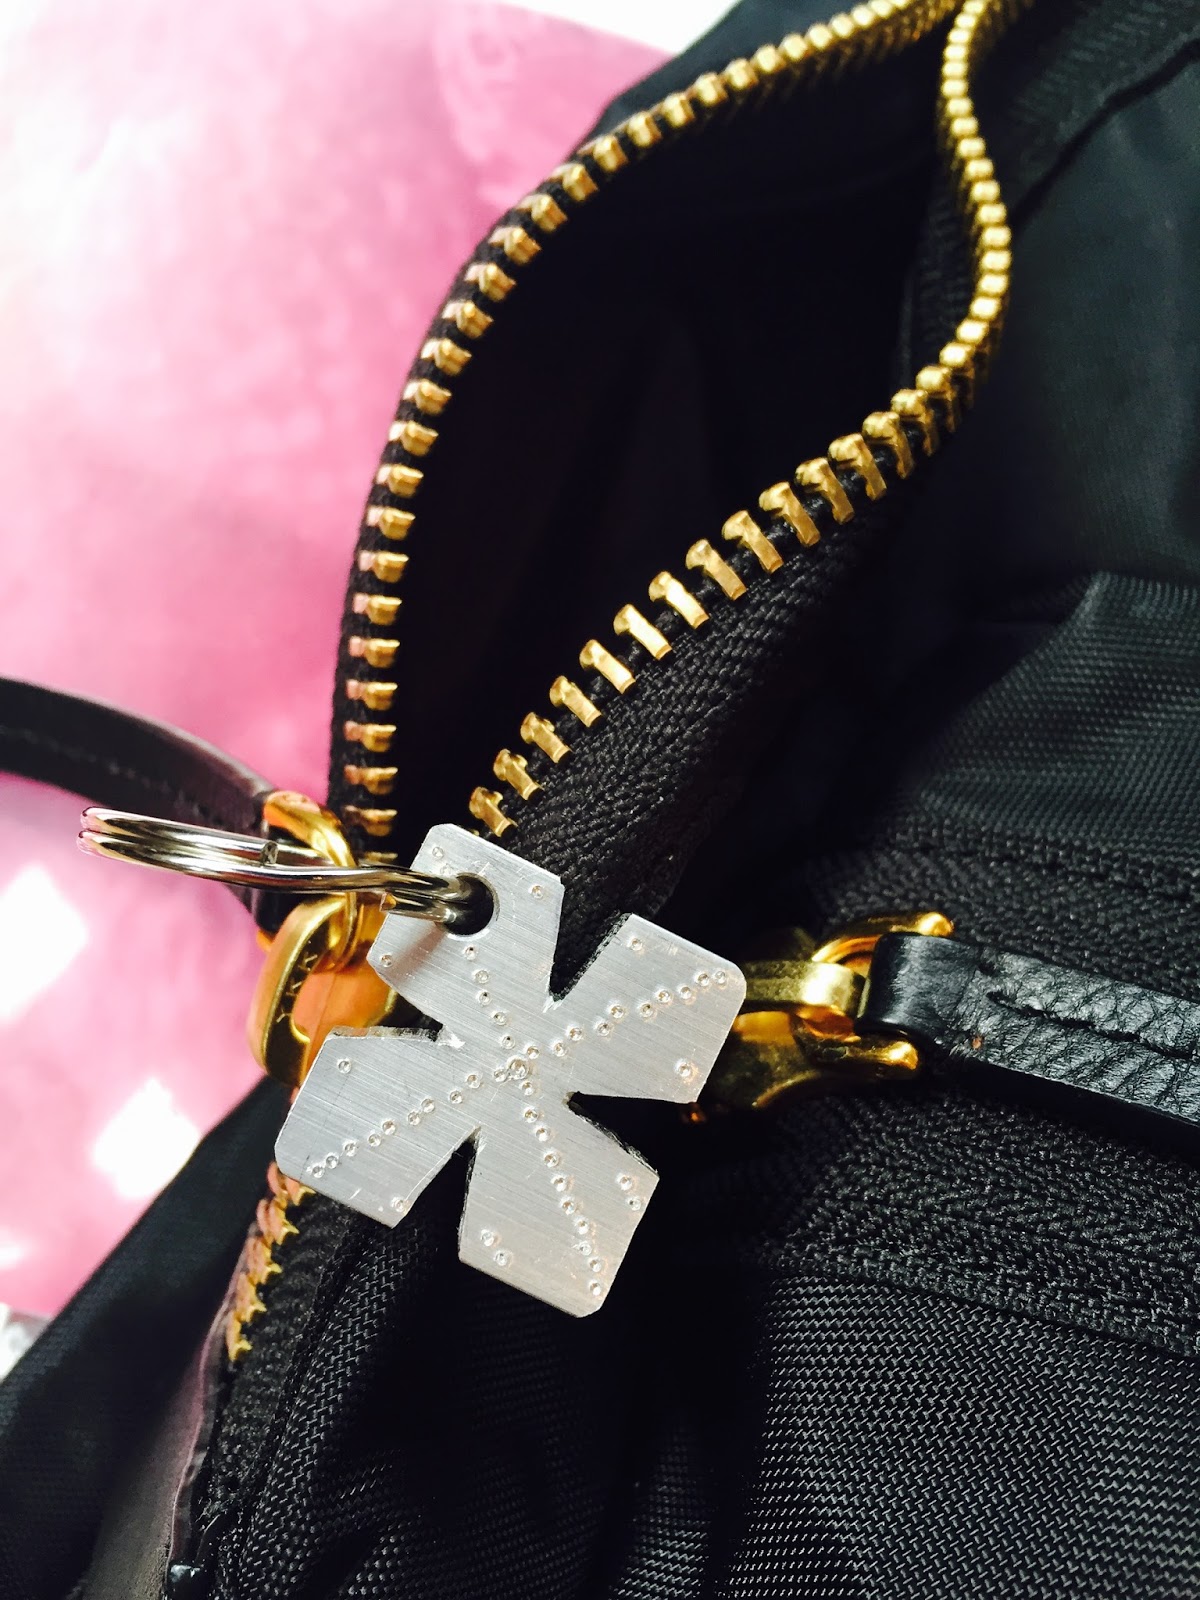
Breaking news: I can operate heavy machinery now. In ENGR 111 Class 4, I learned how to use a band saw and a drill press, making a cute keychain in the process.


Band Saw and Drill Press Safety Rules

1. No loose clothing, hair, or jewelry. Don’t let anything get caught in the machines.
2. Always use goggles when machines are operating, even if you’re far away.
3. Keep fingers away from moving part of machine at all times. Use sacrificial wood blocks to avoid sacrificing fingers.
4. Don’t use the machines at night or when you’re tired. Stay focused.
5. Make sure the machine you’re using works with the material you’re trying to shape. For example, never use a regular chuck with sheet metal.
6. Use peck drilling to allow time for material to pass through the chucks.
7. Make sure everything is securely fastened, including your material and your machine. Though the two machines were pretty snazzy, they did have their pros and cons. The drill press was efficient at making holes through aluminum, but wasn’t so accurate. It was particularly hard to drill smaller holes; a few of the chucks even broke. The band saw was similarly efficient, but its blades were thick, making it difficult to execute detailed designs. In addition, the band saw could only cut straight lines through the material and was unable to handle turns of any kind.


My design sketch
The challenge was to create an aluminum keychain using these two machines and an aluminum block. I sketched out the design before I tried to execute it, not knowing if it was possible. The sharp “V” shapes I wanted to create on each side of the keychain were of particular concern because I was unsure if the thick band saw would be able to produce my vision.

I was pleasantly surprised! Though the keychain would certainly have benefited from more precise equipment and more pre-production measurements, I was happy with how my final product aligned with its original design. I now proudly carry it around on my backpack.


0 comments:

Milk Frother

7:48 AM vivvzh 1 Comments

When others ask me what engineering class is like, I reply that I’m taking adult kindergarten because I don’t remember another time since my Play-Doh and building block days that I’ve had so much fun in class. After building our own milk frothers (using Legos!) at the end of Class 2, we spent Class 3 taking apart and analyzing IKEA’s $2 version, comparing it to a higher-end model, and testing out our homemade versions.

IKEA Milk Frother

The IKEA milk frother promises to fully froth hot or cold milk within 20 seconds. I tested this to be true; the device efficiently frothed my cup of cold milk without making any splashes. Its handle is designed with a side push-switch that intuitively fits in the user’s right or left hand. The grooves on the switch and its visible sliding “slot” is an effective affordance. The battery slot at the end of the handle also has grooves that prompt the user to slide the cap out. Once the device is switched on, the most obvious feedback is that the wand begins to spin. I thought that the device’s main weakness was its lack of feedback for battery power. It’s impossible to tell if the device is running out of battery until, presumably, it stops working.


 I then disassembled the device and guessed about the nature of each piece. From taking the frother apart, I’ve learned how tricky it is to cram even a few “simple” functionalities into a device. For example, though the push-switch looks uncomplicated from the outside, on the inside it’s connected to the motor circuit by carefully assembled bits of metal.


High End Milk Frother

The IKEA milk frother costs around $3, whereas this higher end milk frother (first photo, to the right) costs $20. They are equally effective at frothing milk, but the higher end milk frother feels clearly made of more durable and aesthetically pleasing materials. The handle is made of heavy, polished plastic, and its bottom is made of rubber. The price differential comes from the high end frother’s use of these materials, but I’d guess that the difference in manufacturing costs isn’t actually that much—most likely, the frother is overpriced due to its market positioning, branding, etc. If I were to buy a milk frother, I’d stick with the IKEA one. Shiny plastic isn’t worth $17 to me.


Homemade Milk Frother

This is the homemade milk frother my partner Michelle and I made. It’s designed to be manually twisted up and down, which turns the wheel through the milk creating bubbles. Though our frother did create bubbles in the milk, it was slower and much more labor-intensive than the IKEA frother. The bubbles it created were gone quickly. Our product’s main affordance is its two handles and its wheel shape, which suggests to the user that they should grasp the handles and turn. The wheels are also visible, so the user knows right away that it’s working. While our product does froth milk to some extent, it fails in comparison to the electric frothers we tested out. In addition, it only works in cups with wide openings. To improve the device, I’d lengthen the handles, make the wheels smaller, and incorporate some mechanism (similar to those used by bicycles) to make the wheels spin faster.


1 comments:

Vending Machine

6:43 PM vivvzh 1 Comments


Introduction

This is a diagram of a Coca Cola vending machine located near the Emporium in the Lulu Chow Wang Campus Center. All drinks are priced at $1.50 and the machine takes cards, cash, and coins. After testing the machine out, I determined that its usage flow is: 1. swipe your card or insert coins/cash; 2. find your desired drink’s letter and number code; 3. enter letter and number combination; 4. receive drink. The machine’s clearest affordances are its payment options: the card, cash, and coin slots. Notably, the card slot is at eye level, while the cash slot is directly underneath and the coin slot even further down. This prompts the user to use their card whenever possible and establishes the hierarchy of payment options (card>cash>coins). Upon approaching the machine, it was unclear whether I should select my drink first or pay first. You actually have to pay first: once you’ve swiped your card (or otherwise), the LED display changes and prompts you to select a drink by entering the letter/number combination using the 18-button keypad. Though this 18-button keypad is not great in terms of mapping (positions do not correspond to drink positions), it allows for 27 different combinations. When it comes to letting the user know its progress, this vending machine’s primary mode of communication is the aforementioned LED display. Once you’ve selected your drink, of course, you can also see your drink being delivered from the shelves.


Pros and Cons

This machine’s pros are that it’s versatile in terms of payment options, and the labels next to each slot are nicely labeled to guide the user (e.g. the card sticker illustrates which side the card should face). The labels beneath each drink are bold and easy to read. However, many drinks are repeated under different labels, potentially confusing a user who's attempting to differentiate between two or more “options” which are actually the same. In addition, the flat price—$1.50—is unclear at first glance and only displayed in tiny letters next to the coin slot or on the LED screen after you’ve swiped your card. The machine’s accepted cards are displayed twice, which is redundant and confusing since the second sticker includes more accepted cards than the first. Once the drink has been delivered, you have to bend down to retrieve it, which is annoying if you’re carrying heavy things and prohibitive if you have a physical disability.


Suggestions for improvement

1. Prominently display the flat price; 2. move the drink retrieval slot to eye level; 3. separate the letter/number selection buttons from the coin slot and have them displayed much further up; 4. only display accepted cards in one location.

1 comments:

Introduction

9:50 AM vivvzh 0 Comments

Hello friends! My name is Vivian and I’m a Wellesley first-year interested in Media Arts and Sciences and Economics. In taking Product Creation for All, I hope to gain an understanding of the creative process from brainstorming to iterations to production to testing. I wish to learn about balancing user needs with production limitations. And having spent my whole life in apartments with no garages, I’m also very excited to learn fabrication in the lab. In the future, I see myself working in product design and user research.

Product Analysis: Shure Earphones

"R" and "L" labels

How do you put these on?

Now they're snug!

What's good and bad about these earphones?

These in-ear earphones have a bendable wire component that creates a tight sound seal customized to each user. Its purpose is two-fold: to noise-reduce and to keep the earphones snugly attached. It’s effective in all sorts of situations from studying in a loud room to exercising. On the other hand, these earphones are so confusing to put on! As illustrated in the photos, each earpiece is labeled with “R” and “L”, but there’s nothing to indicate which side is “up” and how to orient the wire. Yet having extra labels everywhere would also be confusing and aesthetically unappealing.

Questions

On a small device like a pair of earphones, how can we make usage intuitive without compromising aesthetics (as wearables are often also fashion statements)? A few ideas: color code top/bottom and right/left (color combinations could vary based on self-expression), or mold the earpieces to a thumb shape to help with gripping and inserting.

0 comments: